Roof Steel + Trims | The Dog House | 24' x 48' Storage Build | Ep 8
- MR Post Frame
- Apr 19, 2024
- 2 min read
Welcome back to MR Post Frame, everyone! Today's post is all about the nitty-gritty of installing trims and roof steel on my "Dog House" build. But before we dive into the technicalities, let me remind you about our design service available at fortybuildings.com. Whether you're envisioning a barndominium or need assistance with any construction project, we've got you covered. Also, for those interested in self-building or exploring post-frame construction, consider joining our Patreon group for valuable insights and community support.
Now, let's jump into the roof installation process. I've already completed the plywood and synthetic roofing paper on the other side of the roof and meticulously snapped all my chalk lines. This ensures precise alignment of screws with the purlins, maintaining structural integrity. However, in the midst of preparations, I realized I forgot my snips, a minor setback easily rectified with a quick trip to grab them.
With the snips in hand, it's time to secure the drip edge trim. This critical component not only enhances the aesthetics but also plays a crucial role in redirecting water away from the structure, protecting it from potential damage. As I tackle this task, I'll also share a useful solo installation tip involving a 2x6 and structural lags to maintain a consistent overhang, ensuring a professional finish even when working alone.

Moving on to the steel panels, I meticulously mark the purlin locations and begin securing them, paying close attention to both the top and bottom alignments for a seamless fit. Alongside, I'll attach the rake trim, strategically placing screws to minimize oil canning, a common concern in metal roofing installations.
Next up is the installation of the vented closure at the ridge cap, a crucial step in ensuring proper ventilation while safeguarding against water infiltration. I'll demonstrate a method that not only guarantees a secure fit but also simplifies the installation process, saving both time and effort.

Now, let's address a common query regarding screw placement on the roof steel. While manufacturers may offer options, I prefer screwing into the flat, ensuring intimate contact and reducing the risk of over-tightening, which could potentially damage the roofing material.
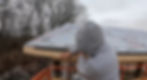
Wrapping up, despite the looming snowstorm, significant progress has been made with the roof installation. While I'll need to complete the remaining screws later, the structure is secure for now. Stay tuned for future posts where we'll delve into additional construction aspects, covering everything from structural connections to window boxes.
Thank you,
MR Post Frame

Patreon Group:
Interested in tackling your build on your own? If you want to explore the possibility of being your GC or self-building, our Patreon membership is for you! It's a community of like-minded people offering support, discounts, Q/A, and more.